MrSaltolo Logo

YouTube Pinterest Facebook Google+ Twitter

Thursday 23 January 2014

BUILDING A 72g BOWFRONT AQUARIUM STAND - P4 - STAINING & FINISH

Welcome to Part 4 of 'Building a 72 gallon Bowfront Aquarium Stand.' In this EduCast, I stained and finished aquarium stand.

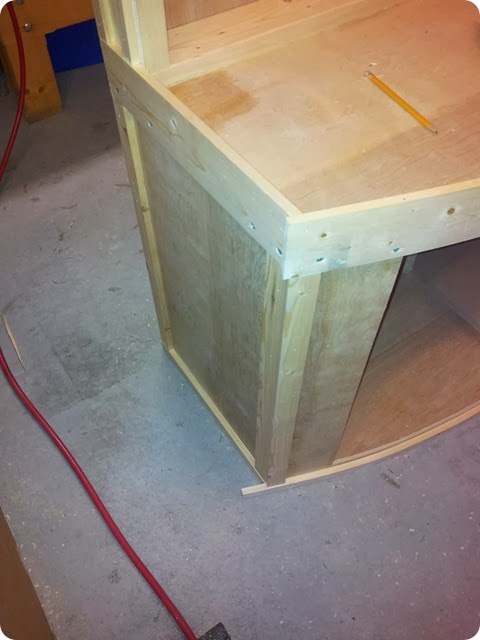
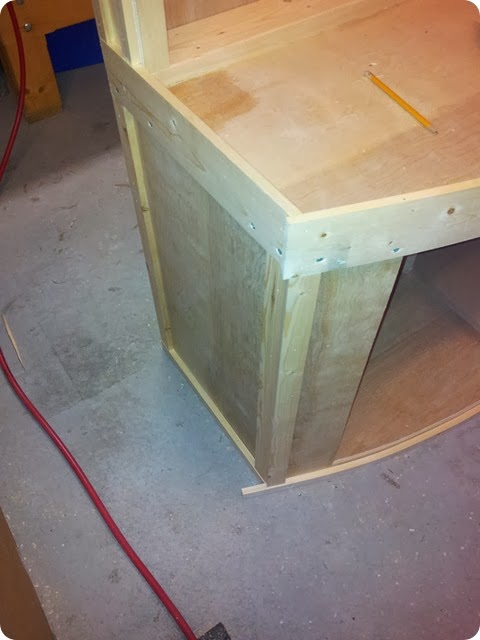
You should have the base and canopy support already built  and trimmed from Part 1, Part 2, and Part 3  of this series, which would look like this.Completed Part 3

YouTube Pinterest Facebook Google+ Twitter

Thursday 16 January 2014

BUILDING A 72g BOWFRONT AQUARIUM STAND - P3 - THE CANOPY

Welcome to Part 3 of 'Building a 72 gallon Bowfront Aquarium Stand.' In this wood working EduCast, I built the canopy for the tank.
You should have the base and canopy support already built  and trimmed from Part 1 and Part 2 of this series, which would look like this.Completed Part 2

YouTube Pinterest Facebook Google+ Twitter

Thursday 9 January 2014

BUILDING A 72g BOWFRONT AQUARIUM STAND - P2 - BACK & SKINNING

Welcome to Part 2 of 'Building a 72 gallon Bowfront Aquarium Stand.' In this wood working EduCast, I built the canopy support and 'skinned' the structure.
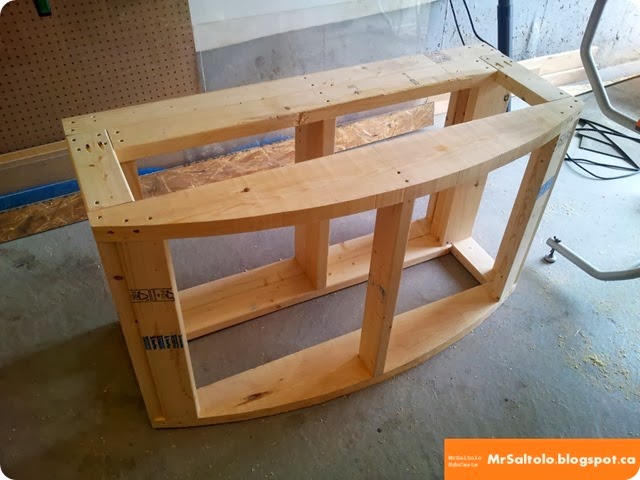
You should have the base structure already built from Part 1 of this series, which would look like this.
Completed Part 1
TIP - For the panels, try to orient the grain so that vertical pieces have vertical grain, and horizontal pieces have horizontal grain. It looks more pleasing to the eye that way.

YouTube Pinterest Facebook Google+ Twitter

Thursday 2 January 2014

BUILDING A 72g BOWFRONT AQUARIUM STAND - P1 - THE BASE

Welcome to Part 1 of 'Building a 72 gallon Bowfront Aquarium Stand.' In this wood working EduCast I built the base of the unit.

The approximate dimensions for the aquarium are 48" wide, 13" deep where it is narrowest, 18" deep where it is deepest, and 23 1/2" high.

1) In the first step, I cut a few of the structural pieces. Starting from the left, I made 2 pieces from a 2" x 8" (48" wide) which were used to shape out the bow portion of the stand. In the center, I made 2 pieces from a 2" x 4" (48" wide) that will hold the back corners together. I also made the vertical pieces that will form the corners from 2" x 4" (25" high).
First cuts

BUILDING FLOATING SHELVES WITH BUILT-IN ACCENT LIGHTING

This summer we decided to re-convert one of our rooms on the main floor from my office into a dining room. One of the neat things about this room are the two perfectly balanced cubby area's on either side of the window.

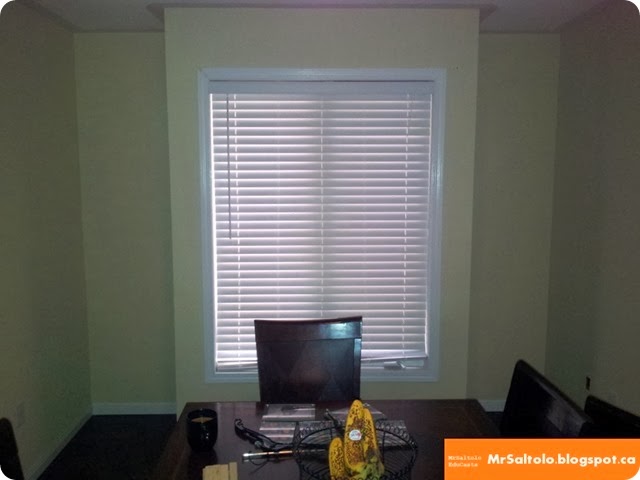
When I saw these cubby areas I knew they'd be perfect for built-in floating shelves. Since I made them from scratch, I decided to also add some recessed lighting into them. Here's the area before I began.Cubby areas before reno
YouTube Pinterest Facebook Google+ Twitter

Thursday 5 September 2013

BABY FARTS

Kids are funny and I knew one day I'd have to make a funny video like this. And, farts have the ability to make everyone laugh. Check out my ‘Baby Farts’ mash-up and have a good laugh. I know I did making the video.

Baby Farts

Enjoy,

Brian
(Don't forget to Pin it, 'Like' it, Share it, and comment below ;)

Cover - Baby Farts

YouTube Pinterest Facebook Google+ Twitter

Tuesday 27 August 2013

MUDHERO - AUGUST 24, 2013 @ ALBION HILLS

Ever wonder what it's like to do a 6k MudHero event? It’s pretty awesome!! Check out the 2 videos below to see what it was like.Me after MudHero

I used the Liquid Image Ego camera strapped to a band on my head to capture the video footage.
The first video is shortened down to just the ‘Obstacles Only’.
MudHero 2013 Obstacles Only
 
The second video is the whole 52 minute run.
MudHero 2013 full 52 minute run
 
Could this be a prep course for Tough Mudder at some point? Hmmm....

Brian
(Don't forget to Pin it, 'Like' it, Share it, and comment below ;)